
Your beauty blender is one of the most essential tools in your makeup routine, helping you achieve that flawless, airbrushed finish. But when was the last time you properly cleaned it? If you’re like most makeup enthusiasts, you’ve probably heard countless hacks—from microwaving your sponge to using dish soap or even skipping cleaning altogether. The internet is flooded with conflicting advice, viral trends, and beauty myths that can leave you confused about what’s actually safe and effective. In this comprehensive guide, we’ll cut through the noise and provide you with science-backed, dermatologist-approved methods to clean your beauty blender without damaging it or your skin. Say goodbye to confusion and hello to genuinely clean makeup tools.
Why Cleaning Your Beauty Blender Is Important
Most people don’t realize that their beloved makeup sponge can become a breeding ground for bacteria, fungi, and other harmful microorganisms within just a few uses. Every time you apply makeup with your beauty blender, it absorbs foundation, oils from your skin, dead skin cells, and environmental pollutants. This mixture creates the perfect environment for bacterial growth, especially when the sponge remains damp.
Using a dirty beauty blender can lead to serious skin issues including acne breakouts, cystic pimples, skin infections, and irritation. The bacteria transferred from an unwashed sponge can clog your pores and introduce harmful pathogens directly onto your face. Beyond health concerns, a dirty sponge also affects your makeup application—buildup causes uneven coverage, streaky foundation, and wasted product as the sponge becomes less absorbent.
Regular cleaning isn’t just about hygiene; it’s about protecting your skin’s health and getting the best performance from your makeup tools. A clean beauty blender ensures flawless application every single time while keeping your complexion clear and healthy.
How Often Should You Clean a Beauty Blender?
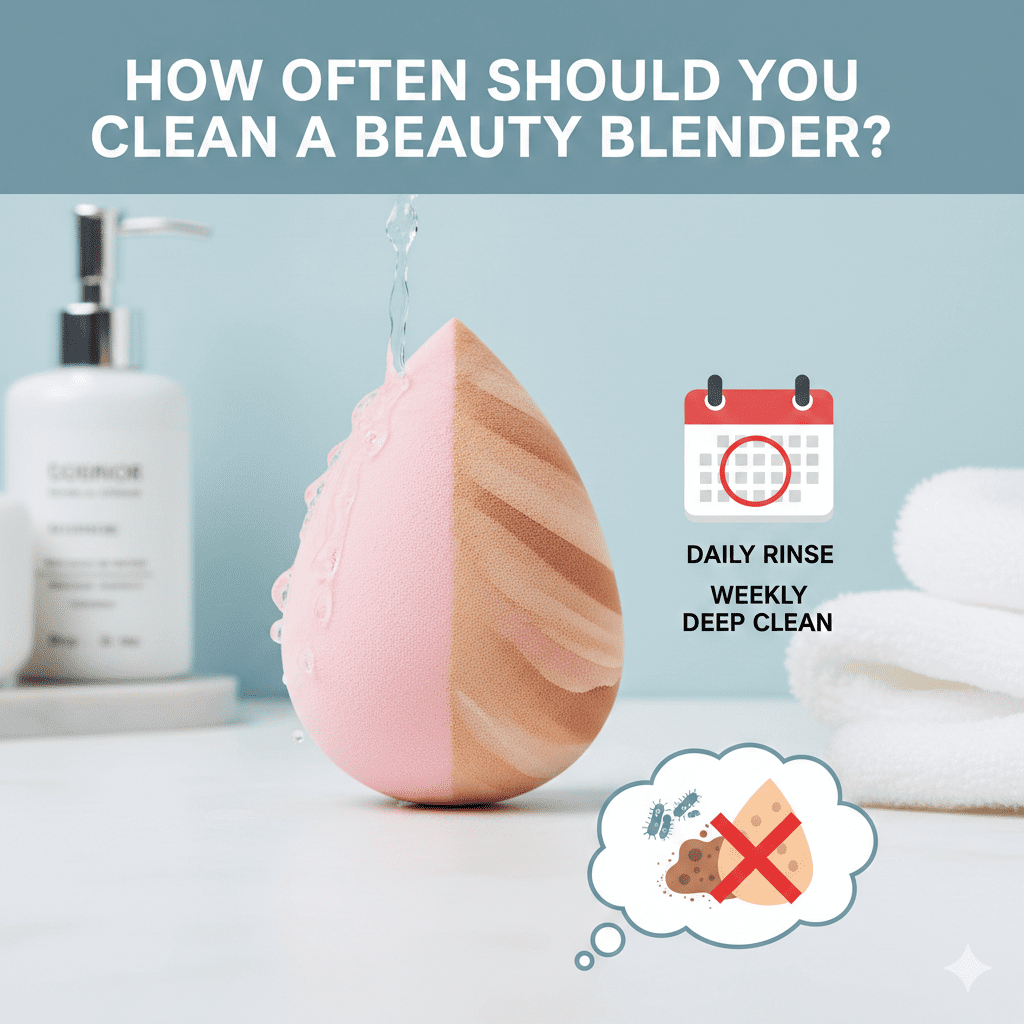
The frequency of cleaning your beauty blender depends on how often you use it, but dermatologists and makeup artists agree on some general guidelines that everyone should follow.
Ideally, you should clean your beauty blender after every single use. This might sound excessive, but consider that you’re applying the sponge directly to your face, which naturally contains bacteria. Each use introduces more bacteria, oils, and product buildup. If you wear makeup daily, daily cleaning is the gold standard for maintaining optimal hygiene.
At minimum, clean your sponge at least once a week. If daily cleaning isn’t realistic for your routine, weekly deep cleaning is non-negotiable. However, be aware that this is truly the bare minimum—you’ll still be applying makeup with a sponge that’s accumulated several days’ worth of bacteria and product residue.
For professional makeup artists who use beauty blenders on multiple clients, sanitization after each client is absolutely essential. Cross-contamination between clients can spread infections and skin conditions, making this a professional and ethical responsibility.
The bottom line: treat your beauty blender like you’d treat a face towel. You wouldn’t use the same dirty towel on your face for days on end, so don’t do it with your makeup sponge either.
How to Clean Beauty Blender Properly (Step-by-Step)
Now let’s get to the core of what you came here for—the actual methods that work safely and effectively without damaging your sponge or compromising your skin health.
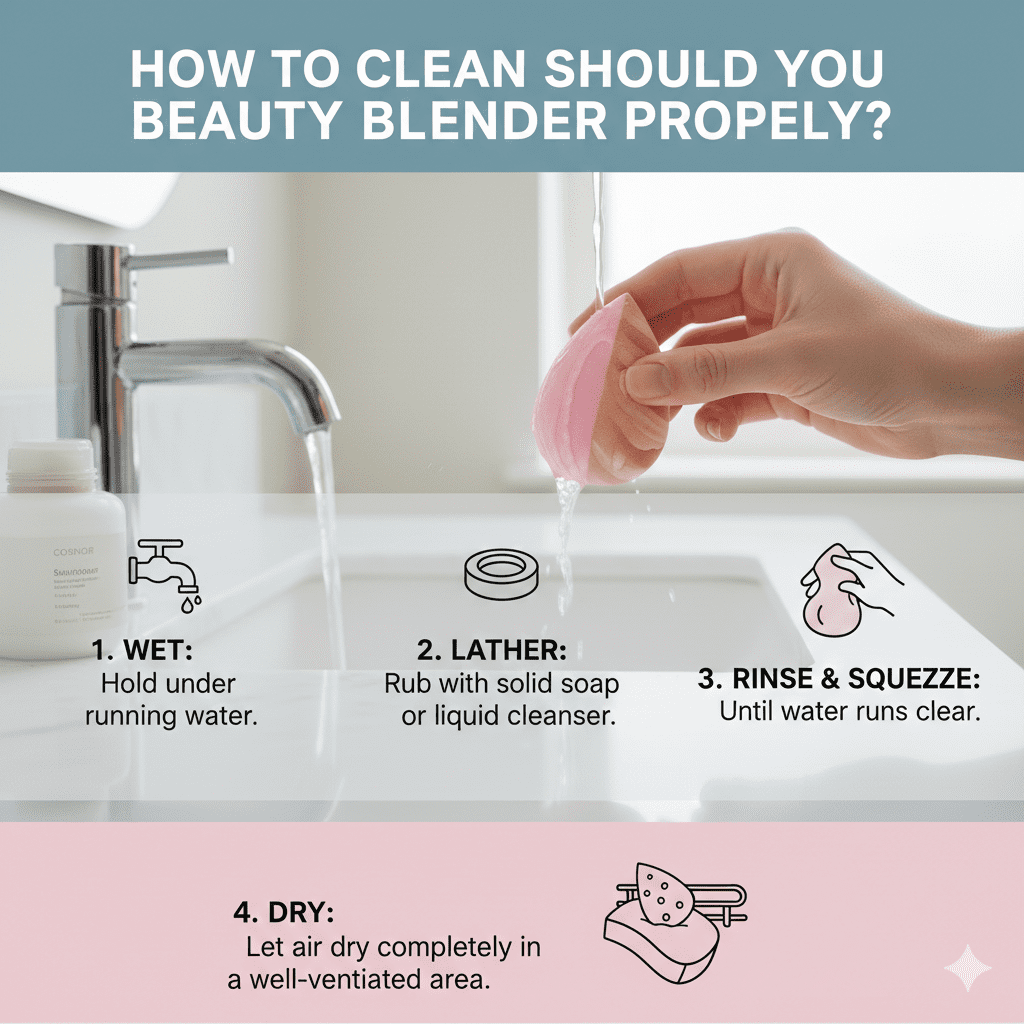
Method 1 – Gentle Soap & Water (Safest Method)
This is the most reliable, dermatologist-recommended method that won’t damage your beauty blender or leave harmful residue.
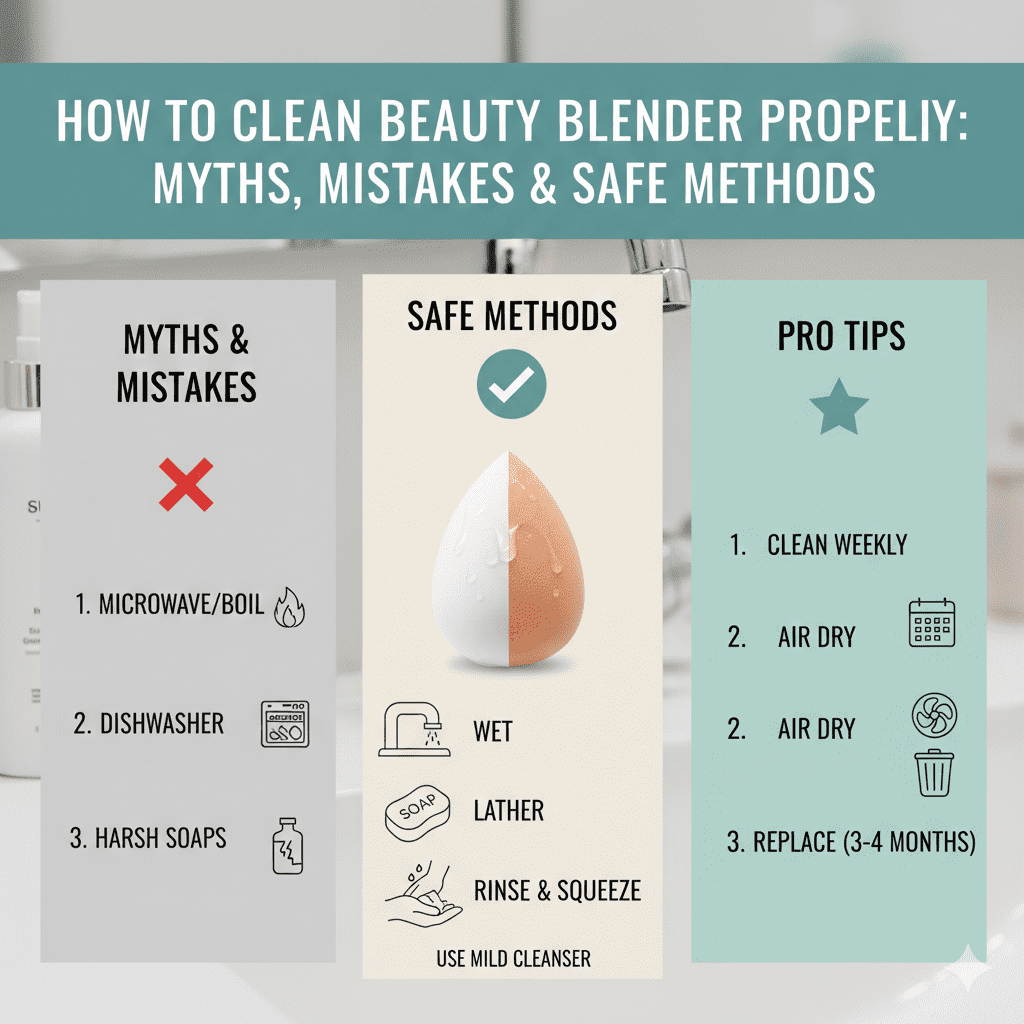
Step 1: Wet the sponge thoroughly. Run your beauty blender under lukewarm (not hot) water until it’s completely saturated. The sponge should expand to its full size.
Step 2: Apply a mild cleanser. Use a gentle, fragrance-free cleanser like baby shampoo, gentle hand soap, or a dedicated makeup brush cleanser. Avoid harsh dish soaps or antibacterial soaps with strong chemicals. Apply a small amount (about a quarter-size) directly onto the sponge.
Step 3: Gently squeeze and massage. Work the cleanser through the sponge by repeatedly squeezing it in the palm of your hand. You’ll see makeup and residue releasing into the water. Continue this motion, being careful not to twist or wring the sponge aggressively, as this can tear the material.
Step 4: Rinse until the water runs clear. Hold the sponge under running lukewarm water while continuing to squeeze gently. Keep rinsing until absolutely no soap or makeup residue comes out and the water is completely clear.
Step 5: Air dry completely. Gently squeeze out excess water with a clean towel (don’t twist), then place the beauty blender in a well-ventilated area to air dry. Never store it damp or in a closed container.
Method 2 – Cleanser Made for Makeup Tools
Specialized makeup tool cleansers are formulated specifically for sponges and brushes, often featuring ingredients that break down makeup more effectively than regular soap.
When it’s useful: These products are excellent for deep cleaning, removing stubborn stains, and maintaining the sponge’s texture. They’re particularly helpful for professional makeup artists who need quick, effective cleaning between clients.
When it’s unnecessary: If you’re cleaning your beauty blender daily and using a gentle soap, specialized cleansers aren’t essential. They’re often more expensive and don’t necessarily provide better bacteria removal than mild soap and water. Save your money unless you need heavy-duty stain removal or prefer the convenience of a dedicated product.
The key is following the same gentle technique—wet, apply cleanser, squeeze (don’t twist), rinse thoroughly, and air dry completely.
Common Myths About Cleaning Beauty Blenders
The internet loves a good hack, but not all viral cleaning methods are safe or effective. Let’s debunk some of the most persistent beauty myths surrounding beauty blender care.
Myth 1: “Microwaving your beauty blender kills all bacteria.” This dangerous trend claims that microwaving a wet sponge will sanitize it. While heat does kill some bacteria, microwaving can cause the sponge to melt, burn, or become damaged. It’s also a fire hazard and doesn’t remove makeup buildup—it just cooks the bacteria into the sponge. Never microwave your beauty blender.
Myth 2: “Dish soap is perfectly safe for cleaning makeup sponges.” Dish soap is designed to cut through grease on dishes, not gently cleanse delicate makeup tools. It’s often too harsh, containing chemicals that can break down the sponge material, cause it to deteriorate faster, and leave residue that may irritate your skin. Stick with gentle cleansers formulated for skin or makeup tools.
Myth 3: “You don’t need to clean your sponge if you only use liquid foundation.” Liquid foundation might seem “cleaner” than powder products, but it still contains oils, preservatives, and other ingredients that build up in your sponge. Additionally, your skin’s natural oils, bacteria, and dead skin cells transfer to the sponge regardless of what type of makeup you use. All beauty blenders need regular cleaning.
Myth 4: “Natural soap is always better and safer.” While natural soaps can be gentle, not all natural ingredients are suitable for cleaning makeup tools. Some natural soaps contain oils that leave residue in the sponge, or fragrances that can irritate skin. “Natural” doesn’t automatically mean “better”—focus on gentle, residue-free formulations instead.
Mistakes People Make While Cleaning Beauty Blenders
Even with good intentions, many people unknowingly damage their beauty blenders or reduce their effectiveness through these common cleaning mistakes.
Using hot or boiling water: While it might seem like hotter water would clean better, excessive heat breaks down the sponge material, causing it to crack, tear, or lose its soft texture. Always use lukewarm or cool water.
Twisting and wringing aggressively: The squeezing motion should be gentle and controlled. Twisting, wringing, or pulling the sponge stretches the material, creates tears, and shortens its lifespan significantly. Think gentle compression, not aggressive manipulation.
Not drying the sponge properly: Leaving your beauty blender damp in a makeup bag, drawer, or closed container creates the perfect environment for mold and bacteria growth. Always ensure your sponge is completely dry before storage, which can take 6-8 hours in a well-ventilated area.
Storing in closed, damp containers: Even if you think your sponge is dry, storing it in a sealed container or bag traps any remaining moisture. This promotes bacterial growth and can cause your sponge to develop a musty odor. Store your beauty blender in an open, breathable space.
Can You Clean a Beauty Blender Without Damaging It?
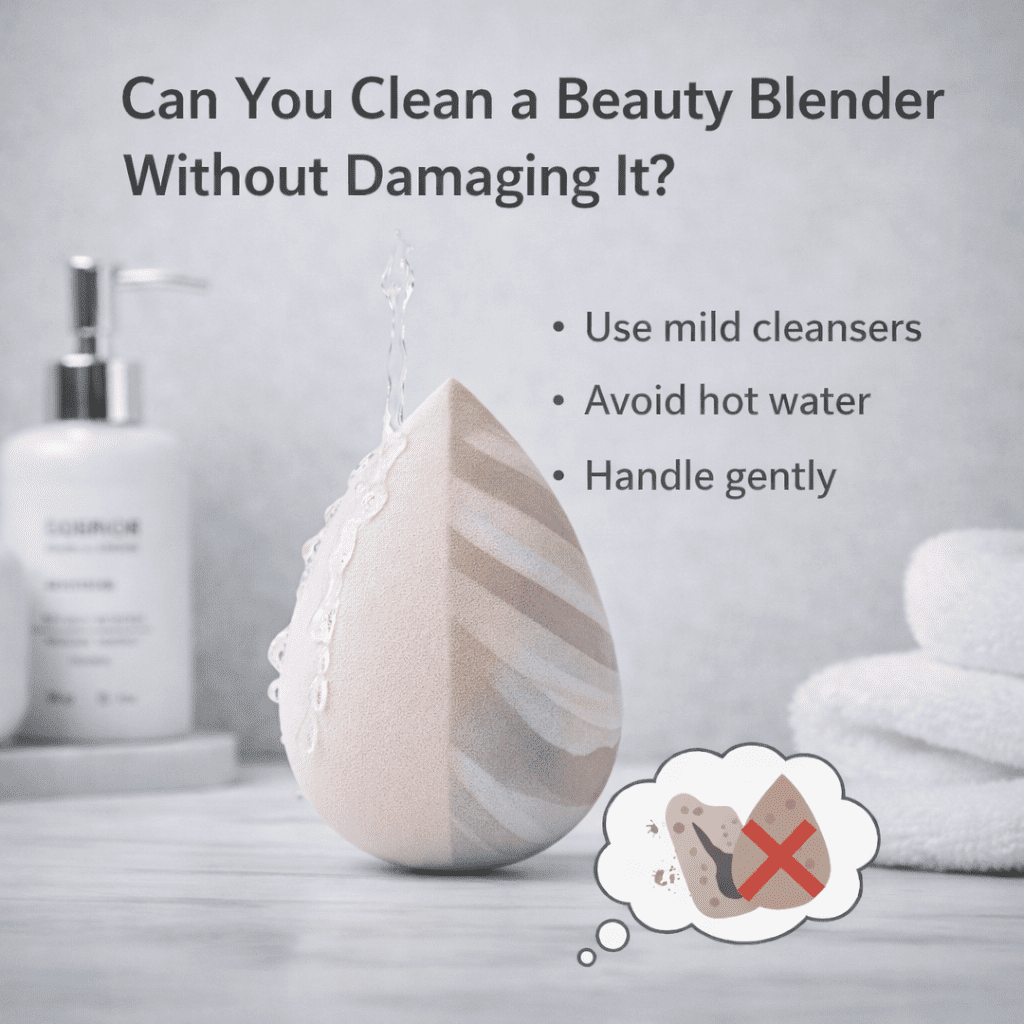
Absolutely—when you use the right methods and understand your sponge’s material composition.
Beauty blenders are typically made from non-latex foam materials that are designed to be durable yet soft. However, this material is sensitive to extreme temperatures, harsh chemicals, and aggressive physical manipulation. The key to cleaning without damage is understanding pH balance and material sensitivity.
Material sensitivity matters: The foam structure can break down when exposed to alkaline cleaners (like many dish soaps) or acidic substances. Neutral pH cleansers (like baby shampoo or dedicated makeup cleansers) maintain the sponge’s integrity while effectively removing makeup and bacteria.
Why harsh methods reduce lifespan: Aggressive cleaning techniques—whether chemical or physical—create micro-tears in the foam structure. Over time, these accumulate, causing the sponge to crumble, tear, or lose its bounce. The “beauty blender bounce” that makes these sponges so effective relies on intact foam cells that expand and contract with water.
Gentle, regular cleaning actually extends your beauty blender’s life by preventing buildup from hardening and degrading the material. Think of it like washing a delicate sweater—frequent gentle cleaning beats occasional harsh treatment every time.
When Should You Replace a Beauty Blender?
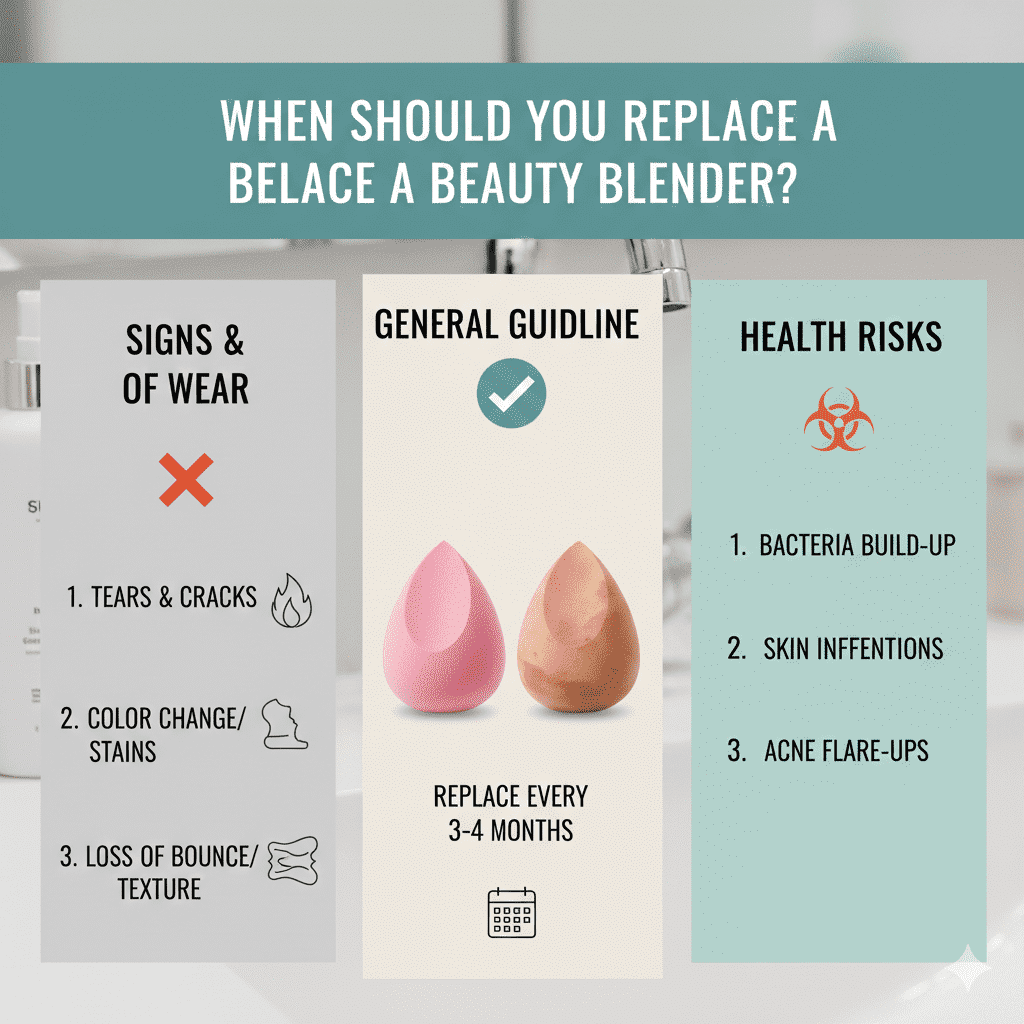
Even with perfect cleaning and care, beauty blenders don’t last forever. Knowing when to replace your sponge is crucial for both hygiene and makeup application quality.
Visible tears or cracks: Any physical damage to the sponge means it’s time for replacement. Tears harbor bacteria that cleaning can’t reach and affect makeup application by creating uneven texture.
Persistent stains that won’t come out: While some staining is normal, especially with deeply pigmented products, stains that remain after thorough cleaning indicate deep product penetration that also means trapped bacteria.
Foul or musty smell: If your beauty blender has developed an odor that persists even after cleaning and complete drying, bacteria or mold has likely colonized the interior of the sponge where cleaning can’t reach. This is a definite replacement signal.
Texture breakdown or loss of bounce: When your sponge no longer expands fully when wet, feels mushy instead of springy, or has areas that feel different from others, the foam structure has degraded. This affects performance and indicates it’s time for a new one.
General timeline: With proper daily cleaning and care, a beauty blender typically lasts 3-4 months. Professional makeup artists who use sponges more frequently might replace monthly. If you’re only deep cleaning weekly, expect a shorter lifespan of 6-8 weeks.
Hygiene Tips to Keep Your Beauty Blender Clean Longer
Beyond regular washing, these hygiene practices help maintain your beauty blender between deep cleans and extend its usable life.
Proper drying technique: After cleaning, gently press your sponge between a clean, dry towel to remove excess water without twisting. Then place it on a clean surface in an area with good air circulation—near an open window or in a bathroom with a fan works well. Some people use dedicated drying racks or stands designed for beauty blenders.
Smart storage solutions: Store your completely dry beauty blender in an open container, breathable mesh bag, or on a clean shelf. Avoid drawers, makeup bags, or anywhere that traps moisture or exposes the sponge to dust and debris.
Keep it out of damp makeup bags: Never put a damp or even slightly moist beauty blender in your makeup bag, especially if you’re traveling. If you must transport it before it’s completely dry, use a ventilated case designed for wet beauty tools.
Never share your tools: Sharing makeup sponges spreads bacteria, fungi, and potential infections between people. Your beauty blender should be as personal as your toothbrush—for your use only.
Rinse after each use: Even if you’re not doing a full clean, quickly rinsing your beauty blender under running water after each use removes surface makeup and prevents it from drying and hardening in the sponge.
Clean Beauty Blender vs “Clean Beauty” – Are They the Same?
This is where terminology can get confusing, so let’s clarify an important distinction that many people mix up.
“Clean beauty” is a marketing term used in the cosmetics industry to describe products formulated without certain controversial ingredients. Brands use “clean beauty” to signal that their products are free from parabens, sulfates, phthalates, or synthetic fragrances. It’s about product formulation and ingredient philosophy, not about physical cleanliness.
“Clean beauty blender” refers to physical hygiene—literally having a beauty blender that’s been washed and is free from bacteria, old makeup, and contaminants. When someone talks about cleaning their beauty blender, they’re discussing the sanitary maintenance of their makeup tool.
Why people confuse the two: Both use the word “clean,” and both relate to health-conscious beauty practices. Additionally, some clean beauty brands sell makeup tools and might market them as “clean” products, further blurring the lines. However, a beauty blender from a clean beauty brand still needs regular physical cleaning just like any other sponge.
Understanding this distinction is important for topical authority—it shows you know the beauty industry landscape and can guide readers through confusing terminology. Your “clean” beauty blender can be used with conventional or clean beauty products; the cleaning protocol remains the same regardless of your product preferences.
FAQ Section
Can I clean my beauty blender with shampoo?
Yes, you can clean your beauty blender with shampoo, but choose wisely. Gentle, sulfate-free baby shampoo or mild clarifying shampoo works well because it’s formulated to be gentle yet effective at removing oils. Avoid shampoos with heavy conditioning agents, strong fragrances, or harsh sulfates, as these can leave residue in the sponge or irritate your skin. Regular hand soap or dedicated makeup brush cleansers are often better choices.
Is microwave cleaning safe?
No, microwaving your beauty blender is not safe and not recommended. While this viral hack claims to sanitize sponges, it can melt or damage the foam material, create a fire hazard, and doesn’t actually remove makeup buildup—it just heats the bacteria and product into the sponge. Stick with gentle soap and water for safe, effective cleaning.
Can a dirty beauty blender cause acne?
Yes, absolutely. A dirty beauty blender harbors bacteria, dead skin cells, oils, and old makeup—all of which can clog pores and cause breakouts when transferred to your face. Studies have shown that unwashed makeup tools can contain more bacteria than a toilet seat. Regular cleaning is essential for preventing acne, skin infections, and irritation.
Can I clean a beauty blender without soap?
While soap is most effective, you can rinse your beauty blender with just water in a pinch. However, water alone won’t remove oils, makeup, or bacteria effectively—it only removes surface residue. For occasional emergency cleaning between proper washes, thorough rinsing is better than nothing, but it’s not a substitute for regular cleaning with a gentle cleanser.
Conclusion
Keeping your beauty blender clean doesn’t have to be complicated or confusing. By following these science-backed methods—using gentle soap and lukewarm water, cleaning regularly, avoiding harsh hacks and chemicals, and replacing your sponge when needed—you’ll protect your skin, extend your tool’s lifespan, and ensure flawless makeup application every time. Remember, the internet is full of beauty myths and viral trends that sound clever but can damage your tools or harm your skin. Stick with proven hygiene practices over trendy shortcuts. Your skin deserves clean tools, and now you have all the knowledge you need to maintain them properly. When it comes to beauty tool care, science and simplicity will always win over hacks and trends.